
Before You Paint: Soft Wash 1–1.5% and Start 2–3 ft Away for Homeowners
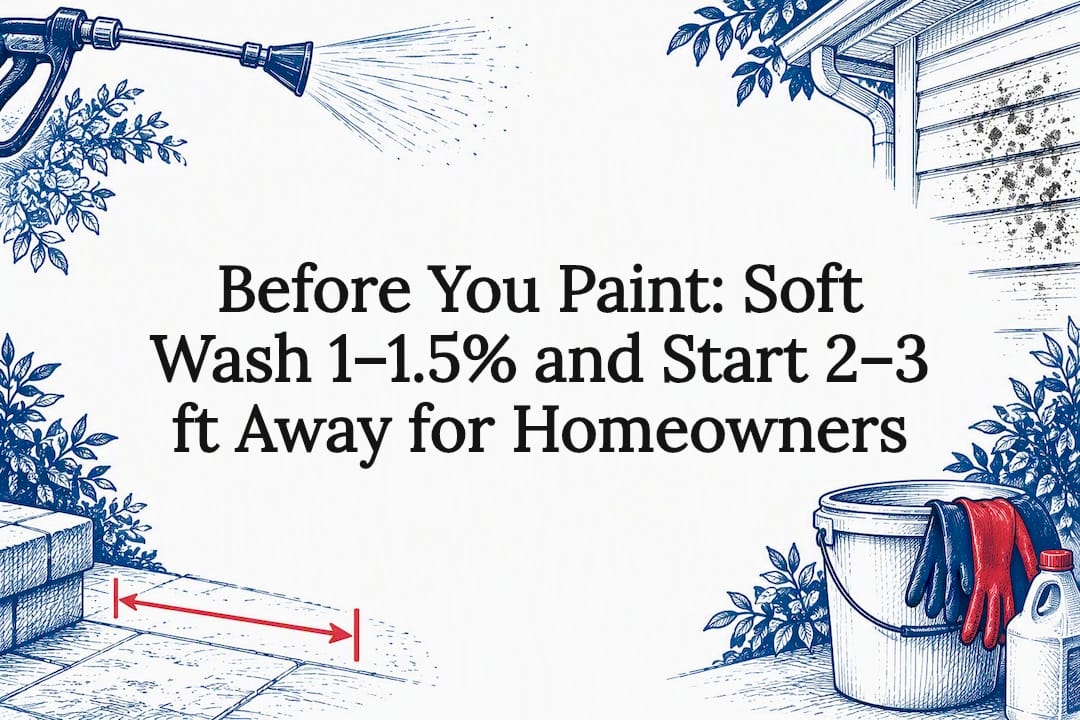
Yes, wash your house before painting if you see mildew, chalking, grease, or grime. Washing strips away the contaminants that stop paint from bonding to the surface. For most siding, use a low-pressure soft-wash approach, not a blast of raw pressure, and let the substrate dry fully before priming. Once dry, scrape, feather-sand, spot-prime, and repair as needed.
Quick Summary:
- Washing is essential before painting to remove mildew, algae, chalking, grease, and dirt that prevent paint adhesion, especially on homes with visible contamination.
- Soft-wash methods with low pressure and cleaning solutions are suitable for most siding types, with pressure washing reserved for masonry or stubborn dirt, and hand scrubbing for grease.
- Surfaces should fully dry within 24 to 72 hours after washing, with moisture tests like touch and paper towel checks confirming readiness before priming.
- Skipping detailed inspection after washing risks sealing in rot, cracked caulk, or other damage that shortens paint longevity, despite the washing process itself.
- Hiring a professional for pre-paint house washing offers more reliable cleaning, damage detection, and proper drying, especially on complex or older homes.
Table of Contents
- Why House Washing Before Painting Actually Matters
- Soft Wash vs. Pressure Wash vs. Hand Scrubbing: Which One Fits Your Siding
- Step-by-Step: The House-Washing Checklist Before You Paint
- Common Pressure-Washing Mistakes That Ruin a Paint Job
- How Long to Wait After Washing Before You Paint
- A Contractor’s Checklist for Pre-Paint Washing
- What Most Painting Guides Get Wrong About Washing
- Get a Pro to Handle the Pre-Paint Wash
- Sources
- FAQ
Why House Washing Before Painting Actually Matters
Paint needs a clean, slightly dull surface to grip. It cannot bite into a film of hand oils, cleaner residue, pollen, or chalky oxidation, even when that film is invisible to the eye. This is why professional painters commonly wash exterior surfaces before repainting: cleaning removes the dirt, grease, mildew and chalk that keep new paint from bonding. Contractors treat this as an adhesion step, not a cosmetic one. The goal is a contaminant-free surface paint can actually grip, not a shinier house.
A handful of conditions make full washing non-negotiable:
- Visible mildew or algae streaking, especially on north-facing walls or under eaves
- Heavy pollen, dust, or road grime built up over a season or more
- Chalking, where the old paint rubs off as powder on your hand
- Smoke or grease film near grills, chimneys, or driveways
A pro might skip full washing in narrower cases: recently applied, good-quality paint in solid shape, low-traffic areas with minimal buildup, or interior touch-up work where spot cleaning gets the job done. On an exterior facing a full repaint, though, skipping the wash is rarely the right call.
Soft Wash vs. Pressure Wash vs. Hand Scrubbing: Which One Fits Your Siding
The method matters more than the effort you put in. Match it wrong and you can strip paint, blow water behind siding, or gouge wood fibers that were never meant to face a jet of water.
Soft-wash is the standard for vinyl, painted wood, stucco, and composite siding, and for anything with mildew or algae. It relies on low pressure paired with a cleaning solution, usually a diluted bleach or surfactant blend, to break down biological growth without forcing water into seams. Homeowners commonly use concentrations in the 1 to 1.5 percent range for surfactant or bleach blends on biological staining, always following label directions. This method lets a crew lift mildew and algae stains without damaging wood fibers or driving moisture into the wall assembly, which matters most on older siding and previously painted wood.
Pressure washing has a narrower, more specific use: masonry, concrete, brick, and stubborn ground-in dirt that soft chemicals alone won’t shift. Even here, PSI and nozzle choice determine whether you clean the surface or damage it, since pressure washers vary widely in output and spray pattern. Stick to 1,200 to 1,900 PSI on siding materials, start 2 to 3 feet away with a wide fan tip, and move closer only if the surface clearly needs it.
Hand scrubbing with degreasers covers what pressure alone can’t fix. Heavy grease near grills or vents usually calls for TSP or a phosphate-free degreaser, rinsed thoroughly afterward. Light dust and grime respond fine to dish soap and water. Mildew spots respond to diluted bleach.
Pro Tip: Always test your cleaner and pressure setting on a hidden patch, like behind a shrub or under a porch rail, and wait a few minutes to check for discoloration or lifted paint before treating the whole wall.
Step-by-Step: The House-Washing Checklist Before You Paint
Work through these steps in order, whether you’re doing it yourself or briefing a contractor.
- Inspect first. Walk the exterior looking for peeling paint, soft or rotted wood, chalking, and failed caulk. If your home was built before 1978, assume lead paint is possible and plan accordingly before disturbing any surface.
- Protect the property. Cover outdoor outlets, close windows, move furniture and grills, and soak nearby plants with plain water before applying any cleaner, since runoff can scorch landscaping.
- Mix and test. Prepare your cleaning solution at label-recommended strength and test it on a small hidden section first.
- Wash top to bottom. Work in overlapping passes, keep the nozzle moving, and never linger in one spot on wood or vinyl.
- Rinse thoroughly. Residue left behind, whether soap, bleach, or dissolved chalk, will show up as a hazy film under fresh paint.
- Check initial drying. Look for pooling water in trim, under sills, or behind shutters before moving on to repairs.
Surface prep, including washing, scraping, sanding, caulking, and priming, is what actually determines how long a paint job lasts. Skip a step here and you’re gambling with the whole project.
Common Pressure-Washing Mistakes That Ruin a Paint Job
Most exterior paint failures trace back to prep mistakes, not the paint itself. A few shows up over and over on repaint jobs:
- Standing too close with a narrow nozzle, which can strip wood fibers or peel vinyl edges
- Using turbo or zero-degree nozzles on siding instead of a wide fan tip
- Skipping the rinse step, leaving cleaner residue that shows up as adhesion failure weeks later
- Painting over a surface that looks dry on top but is still damp underneath the boards
- Disturbing old paint on a pre-1978 home without lead-safe precautions
Two of these deserve extra caution. Excess pressure doesn’t just strip paint, it can drive water behind siding and into wall cavities, where it causes rot you won’t see until it’s too late. And on any home built before 1978, disturbing old paint layers without EPA RRP-certified practices risks lead exposure. If your inspection turns up flaking paint on an older home, stop and call a certified contractor rather than scraping it yourself.
Wear eye protection and gloves any time you’re handling bleach, TSP, or degreasers, and never mix bleach-based cleaners with ammonia-based products.
How Long to Wait After Washing Before You Paint
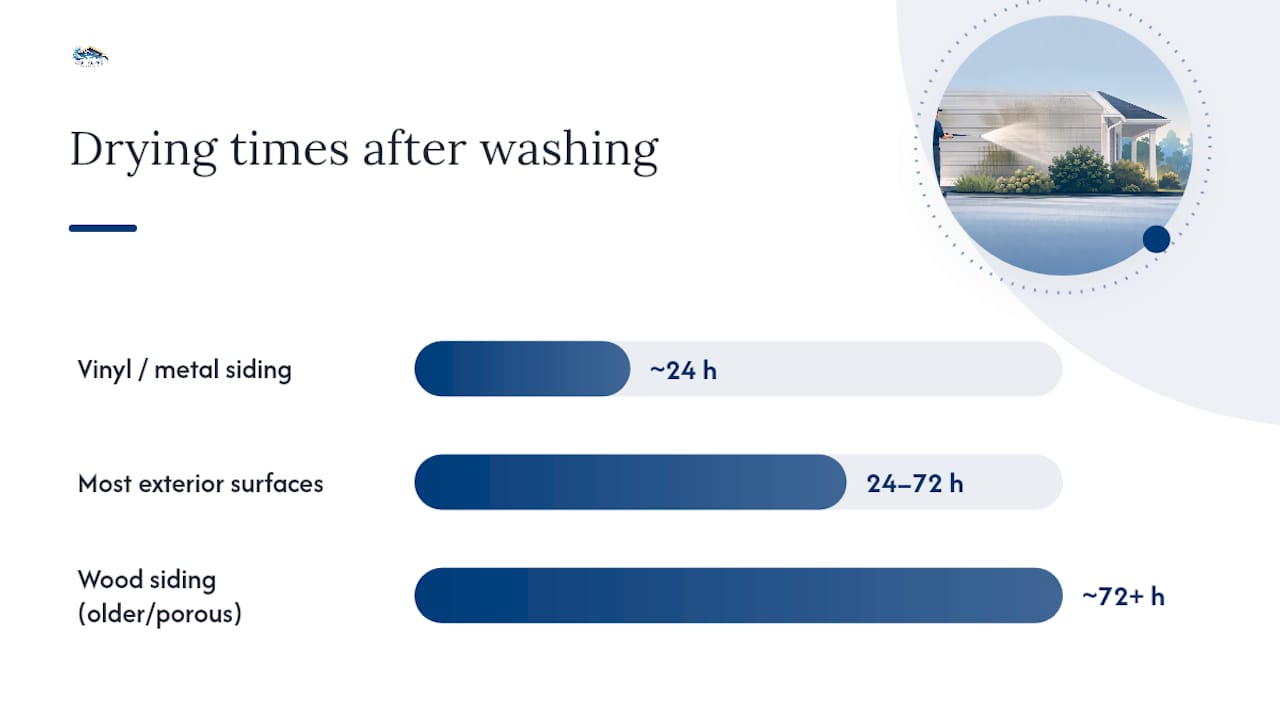
Most exterior surfaces need 24 to 72 hours to dry fully after washing, and that range shifts a lot depending on humidity, sun exposure, and material; for practical homeowner-focused timing guidance on drying windows after pressure washing, see pressure washing before painting. Vinyl and metal siding shed water fast and often dry within a day in good weather. Wood siding, especially older or porous wood, holds moisture longer and may need the full 72 hours, sometimes more in shaded or humid conditions.
A few quick ways to check before you commit to painting:
- Touch test: Press your palm flat against the siding. Any coolness or dampness means it’s not ready.
- Paper towel test: Press a dry paper towel against the surface for a few seconds. If it comes away damp, wait longer.
- Moisture meter: For certainty on wood siding, a pin-type moisture meter reading under 15 percent is a safe target before priming.
General guidance from resources like The Spruce echoes this: rinse every trace of cleaner off the surface and let it dry completely before any primer touches it. Painting over a surface that’s still holding moisture traps that moisture under the new coat, and that’s a callback waiting to happen.
Once the surface passes dry, move into post-wash prep. Scrape any paint that’s lifting or flaking. Feather-sand glossy or uneven edges so new paint has something to grip. Spot-prime stains, bare wood, or patched areas with a stain-blocking primer. If more than 20 to 30 percent of a wall shows bare wood or failed paint, prime the whole section rather than spot-treating.
Pro Tip: Check drying progress in the late afternoon rather than right after washing. Morning dew and afternoon humidity swings can make a surface look dry when it’s actually still holding water underneath.
A Contractor’s Checklist for Pre-Paint Washing
After years of soft-washing homes across the Capital Region, our crews at Capital Pro Pressure Washing have settled on starting points that work on most siding without guesswork.
We typically start soft-wash mixes at the low end of the standard 1 to 1.5 percent range for general mildew and algae, and only step up strength when biological growth has really taken hold, like thick black streaking under eaves that’s been there for a season or two. On nozzle and distance, we start every unfamiliar surface at a wide fan tip from roughly 3 feet out, then confirm there’s no lifting, dulling, or fiber damage before working closer or adjusting pressure.
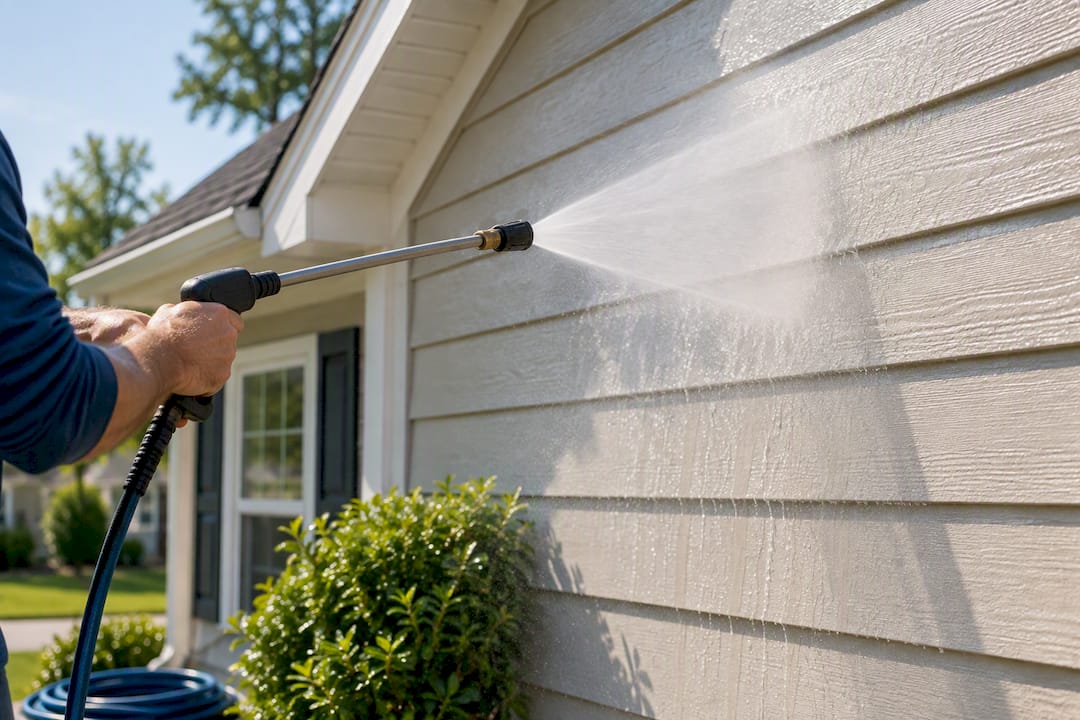
What we find most often once a wash is done and the surface is visible: soft spots in trim boards, caulk that’s cracked or pulled away from joints, and rot hiding behind gutters or downspouts that owners never noticed. Catching these before paint goes on saves a callback six months later.
For homeowners planning their own pre-paint wash, or briefing a contractor:
- Confirm the siding material before choosing a cleaner or pressure setting
- Ask what concentration will be used on mildew-heavy areas
- Request a written note on any soft wood, cracked caulk, or peeling found during washing
- Build in at least 48 hours of drying before scheduling primer
What Most Painting Guides Get Wrong About Washing
Most advice on this topic treats washing as a box to check, wash the house, wait a couple days, paint. That’s not wrong, but it undersells what actually determines whether the paint job lasts five years or fifteen.
The real leverage point isn’t the wash itself. It’s what the wash reveals. A soft-wash that removes mildew and grime exposes soft wood, failed caulk, and hairline paint cracking that were hiding under the dirt. Homeowners who treat washing as the finish line skip straight to primer and miss those signs. Preparation quality, not the paint brand, drives how long a paint job actually lasts, and washing is only the first quarter of that preparation.
The other place conventional advice falls short is drying time. Plenty of guides give you a flat “wait 48 hours” rule and move on. Humidity, shade, and siding material change that window enough that a fixed number is more guess than guidance. A five-minute touch test beats a memorized rule every time.
If you take one thing from this guide, prioritize the inspection you do right after washing, not the wash itself. That’s the ten minutes where you catch the rot, the cracked caulk, and the failing spots before they’re sealed under fresh paint for the next decade.
— Luis T
Get a Pro to Handle the Pre-Paint Wash
A DIY soft-wash works fine for a small ranch home with light dust and a weekend to spare. It gets a lot harder once you’re dealing with two-story siding, ladder work near rooflines, thick mildew that’s been building for years, or a pre-1978 home where lead paint rules apply. That’s where the calculation changes: a botched wash costs you a repaint, while a professional soft-wash gets it right the first time and protects the surface you’re about to paint.

A local pressure washing company typically uses a soft-wash approach similar to this guide on homes in the area, employing commercial-grade equipment and cleaning solutions matched to the siding type, such as vinyl, wood, or composite. A typical pre-paint visit includes an inspection for mildew, chalking, and repair needs, a full soft-wash, a thorough rinse, and notes on any findings relevant to the painting process. The crew that performs the work is consistent, and services typically come with a satisfaction policy that may include callbacks if necessary.
If you’re planning a repaint this season, get an instant quote and have your siding material and any visible mildew or peeling ready to describe. You can also browse house washing services for the Capital Region to see what’s included before you book.
Sources
- Do Professional Painters Wash Walls Before Painting? — Lange’s Painting
- Do Professional Painters Wash Walls Before Painting? The Honest Answer - D and G Flooring
- Pressure Washing Before Painting: Complete Homeowner Guide | D&D Pro Painting
- Soft Wash Siding: 1–1.5% On Surface Concentrations Homeowners Need
FAQ
Do Professional Painters Wash Walls Before Painting?
Yes. Professional painters routinely wash exterior surfaces before repainting because cleaning removes dirt, grease, mildew, and chalk that block paint adhesion. Even surfaces that look clean can carry invisible films that cause peeling or bubbling later.
Can You Use Dawn Dish Soap to Wash Walls Before Painting?
Dish soap works fine for light dust, pollen, and general grime on siding, but it won’t touch mildew, algae, or heavy grease. For biological growth, use a diluted bleach or soft-wash blend instead, and switch to TSP or a phosphate-free degreaser for grease near grills or driveways.
What Not to Do When Pressure Washing a House?
Don’t stand too close with a narrow or turbo nozzle, since that strips paint and gouges wood fibers on siding. Avoid skipping the rinse step, and never paint over a surface that’s still damp, since trapped moisture under fresh paint almost always causes bubbling or peeling.
How Long to Wait After Pressure Washing a House to Paint?
Plan on 24 to 72 hours of drying time, depending on humidity, sun exposure, and siding material. Vinyl and metal dry fastest, while wood siding often needs the full window; a simple touch test or a moisture meter reading under 15 percent confirms it’s ready for primer.
Does Capital Pro Pressure Washing Offer Pre-Paint House Washing?
Yes, Capital Pro Pressure Washing performs soft-wash house cleaning across the Capital Region as prep for repainting, including an inspection for mildew and repair needs. Current pricing is available through an instant quote based on your home’s size and siding material.
Recommended
Services Related To This Article
Need a quote in the Capital Region?
Fast, free estimates from a local, licensed & insured team.
