
Capital Region: Fix Polymeric Sand Problems, 24–48hr Cure, DIY vs Pro
Most polymeric sand problems trace back to two things: bad timing with water and moisture at installation. If your joints are hazy, crumbly, or washing out, stop watering or walking on them, then check whether the sand went down on damp pavers or got hit by rain too soon. Minor hazing is a DIY fix; large-area washout or a collapsing base usually means calling a pro.
Quick Summary:
- Installing polymeric sand on damp pavers or shortly before rain causes premature activation, leading to hazing and loose joints within weeks.
- Excessive watering or improper technique during installation, such as heavy soaking or leftover surface sand, significantly increases failure risk.
- Damage from freeze-thaw cycles and inadequate drainage under the patio can cause cracks and sinking, requiring professional assessment and repairs.
- Applying sealers before full curing of the polymeric sand can soften the binder, trap moisture, and create hazing or soft joints over time.
- Using the wrong product for your joint size, climate, or traffic load raises the likelihood of early failure and may necessitate complete removal and base repair.
Table of Contents
- Common Causes of Polymeric Sand Problems
- How Do You Diagnose a Failing Polymeric Sand Joint?
- How to Fix Common Polymeric Sand Problems
- Prevention and Maintenance That Actually Extend Joint Life
- What Do Professionals Check That Homeowners Miss?
- How Do Temperature and Humidity Affect Polymeric Sand?
- Can Sealers Damage Polymeric Sand Joints?
- Do Pet Urine and Chemicals Damage Polymeric Sand?
- Are Some Polymeric Sand Brands More Prone to Failure?
- Author’s Quick Take
- Get Professional Paver Re-Sanding in the Capital Region
- Sources
- FAQ
Common Causes of Polymeric Sand Problems
Polymeric sand looks simple to install, which is exactly why it fails so often. The product is a blend of sand and water-activated polymers, and the entire bond depends on getting the water step right, on a dry, clean surface, at the correct joint depth.
Installing on damp pavers is the most overlooked mistake. If the stone surface or joints are still wet from morning dew, recent rain, or a garden hose, the polymers start reacting before you’re ready. That kills the bond and leaves joints powdery or loose within weeks.
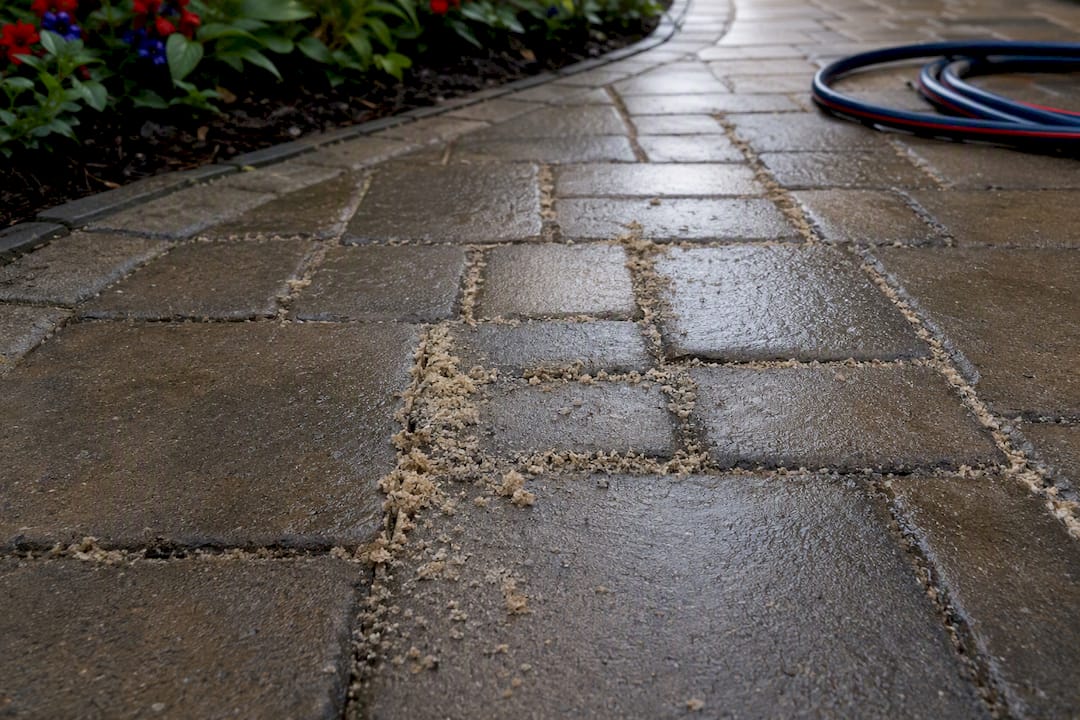
Watering technique causes just as many failures. Too much water during activation washes the polymers right out of the joint, while too little leaves the sand unbonded and prone to blowing or washing away later. Manufacturers specify light misting in multiple passes, not a single heavy soak, and skipping that detail is where a lot of DIY jobs go wrong.
A few other repeat offenders:
- Leftover sand on the paver surface. Any polymeric sand not swept and blown off before watering hardens into a haze or a cloudy film that’s tough to remove later.
- Poor drainage near the patio or walkway. Downspouts, sprinkler heads, and low spots that concentrate runoff erode joints faster than normal weather exposure ever would.
- An unstable base. If the compacted base or bedding layer beneath the pavers wasn’t properly built, joints will crack and sink no matter how well the sand was installed.
- Wrong product for the joint width. Polymeric sand is rated for specific joint widths, and using a product not matching the joint size sets the repair up to fail from day one..
- Overfilling joints. Sand piled above the paver’s chamfer edge traps water on the surface and speeds up hazing.
How Do You Diagnose a Failing Polymeric Sand Joint?
Before you buy more sand, spend ten minutes figuring out which failure you’re actually dealing with. Symptoms overlap, but the fix for hazing is nothing like the fix for erosion.
- Look at the surface first. A cloudy white or gray film means hazing. Peeled or flaky sand on top of an otherwise solid joint suggests the surface layer cured wrong while the base held.
- Check for gaps and washouts. Joints that are visibly lower than the paver edge, or completely empty in a channel pattern, point to water erosion rather than a bonding problem.
- Press a screwdriver or your finger into the joint. Firm sand that resists pressure is healthy. Powdery or loose sand that crumbles away means the polymers never activated properly.
- Look for weeds or ant tunnels. Vegetation growing through joints, or small volcano-shaped mounds of sand, both signal gaps deep enough for seeds and insects to get through.
- Think back to the installation date and recent weather. Sand installed within the last week of a rainy stretch, or right before a sprinkler cycle, explains a lot of early failures.
- Ask whether the joints were tamped and compacted during install. Sand that was poured and swept but never mechanically packed into the joint rarely holds up past one season.
If the damage covers more than a small section, or you suspect the base beneath the pavers has shifted, that’s your cue to bring in a professional rather than keep patching the surface.
How to Fix Common Polymeric Sand Problems
Repairs range from a garden hose job to a full re-sand, so match the fix to what you actually found during diagnosis.
- Clear surface haze first. Sweep and blow off any loose residue, then scrub the affected pavers with warm water and a stiff nylon brush. Small haze patches often lift with hot water and elbow grease, but large-area haze typically needs professional hot-water cleaning or a specialized haze remover since a standard pressure washer can blast out the joints you’re trying to save.
- Reinstall sand in a localized washout. Vacuum or brush out the loose material down to solid ground, confirm the joint is dry, then compact the base with light tamping before reapplying polymeric sand. Follow the same sweep, tamp, and light-misting sequence used in the original installation.
- Replace joints that failed completely. Never top off old, degraded polymeric sand with new material. It won’t bond to the aged polymer underneath, so full removal down to the base is required before reinstalling.
- Address chronic erosion at the source. Extend or redirect downspouts away from the patio edge, adjust sprinkler heads that spray directly onto joints, and add or repair edge restraints if pavers have started to shift.
- Handle freeze-thaw damage at the base, not the surface. Cracked or heaved joints after winter almost always mean water got under the pavers and froze. Patching the visible sand without fixing drainage or the base guarantees the same crack reopens next winter.
Pro Tip: Do every repair on a forecast with at least 24 to 48 hours of dry weather ahead. Rain hitting fresh polymeric sand before it cures is one of the single biggest causes of a repeat washout.
Prevention and Maintenance That Actually Extend Joint Life
Picking the right product matters more than most homeowners realize. Fine-grain polymeric sand suits narrow pedestrian joints, while wider flagstone or driveway gaps need a formula rated for that width and for vehicle traffic. Some blends add Portland cement for extra hardness and water resistance, which helps against erosion but can make the joint more brittle in a harsh freeze-thaw climate, so match the product to your climate, not just your joint size.
Installation habits matter just as much as the product. A solid checklist looks like this:
- Confirm a dry forecast window of at least 24 to 48 hours before starting.
- Sweep and tamp in repeated cycles until joints are completely full, not just topped.
- Blow every trace of loose sand off the paver surface before adding any water.
- Activate with light misting passes rather than one heavy soak.
- Let the joints cure 24 to 72 hours before allowing foot or vehicle traffic, per the manufacturer’s instructions.
Once it’s installed correctly, maintenance is light but not optional. Walk the patio regularly, blow out accumulated debris, and pull weeds promptly to prevent root growth. Avoid power washing immediately after installation and delay sealing pavers until the polymer is fully cured to prevent moisture issues.
Done right, polymeric sand typically holds up for 5 to 10 years before it needs replacement. Watch for early hazing, sand that’s started to pull away from paver edges, or the first hint of weeds coming through. Those are warning signs, not emergencies, if you catch them early.
What Do Professionals Check That Homeowners Miss?
Anyone diagnosing a repeat failure eventually has to check the base, and that’s where most DIY troubleshooting stops. A crew doing a proper assessment tests compaction, traces drainage paths, confirms the sand product matches the joint width, and checks whether the right tools, like a plate compactor or a proper blower, were even used the first time.
A large share of the polymeric sand failures pros get called out for aren’t material defects. They’re installer error: skipped compaction, no removal of excess sand, or work done on a bad weather day. The right tools and enough hands-on experience cut failure rates dramatically compared to a first-time DIY attempt.
Some fixes just need a homeowner with a broom and a hose. Others, full joint replacement, base rebuilding, or hot-water haze removal across a large patio, call for equipment most garages don’t have. Professional crews combine paver cleaning with proper re-sanding and sealing to restore hardscapes effectively. If your washout keeps coming back or you suspect the base has shifted, that’s the point to request an inspection instead of buying another bag of sand.
How Do Temperature and Humidity Affect Polymeric Sand?
Weather does most of the damage that homeowners blame on “bad sand.” Polymeric sand cures through a chemical reaction that needs a fairly narrow temperature and humidity window, and installing outside that window sets up problems before the first bag is even opened.
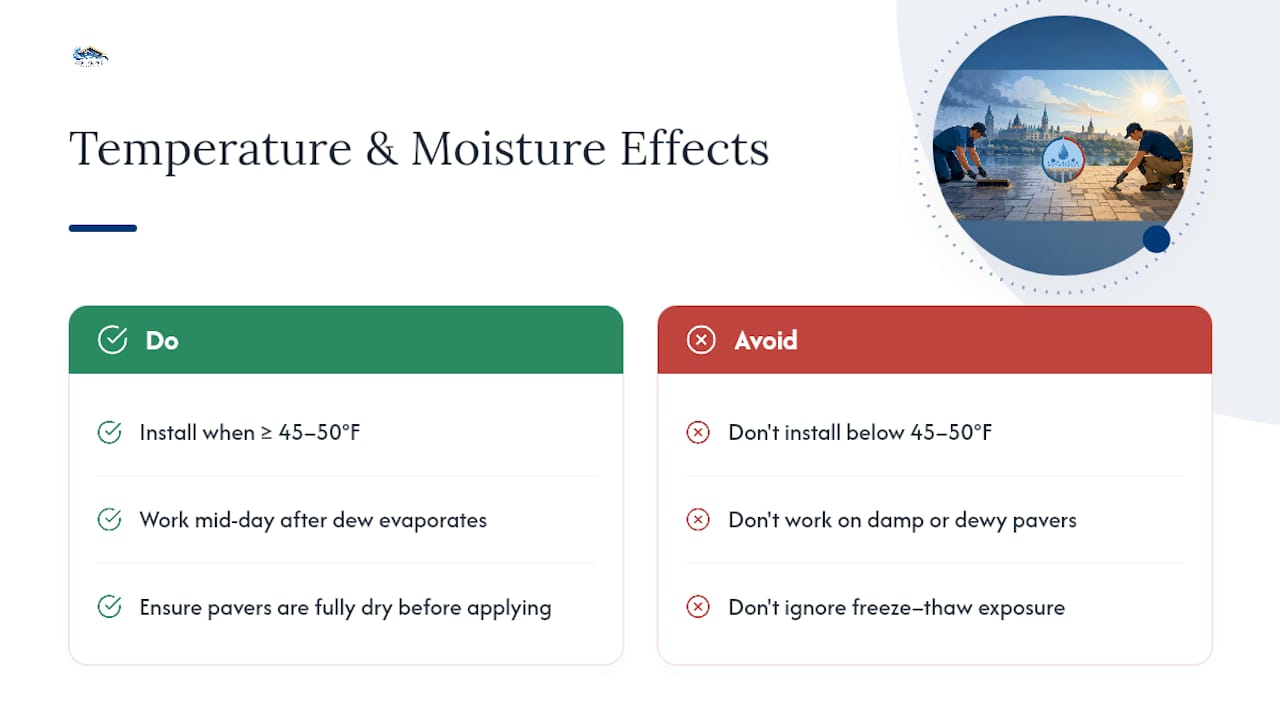
Cold temperatures slow the curing reaction dramatically, which is why most manufacturers set a minimum installation temperature, often somewhere in the 45 to 50 degree Fahrenheit range depending on the brand. Sand applied on a cold day may look fine but never fully bonds, leaving it loose and prone to washing out with the first spring rain.
High humidity and dew create the opposite problem. Even without a drop of rain, morning dew or thick humidity can leave pavers damp enough to trigger premature activation, which is functionally the same failure as installing on wet stone after a storm. That’s part of why the standard advice is to work in the middle of a dry day, once morning moisture has burned off, rather than at first light.
Freeze-thaw cycling is the long-term threat. Water that gets into a joint and freezes expands, cracking or heaving the sand from below even when the surface looked solid all fall. This is why homes in colder climates see faster joint breakdown and why trade sources flag freeze-thaw exposure as one of the material’s real limitations, no matter how well the initial installation went.
Can Sealers Damage Polymeric Sand Joints?
Sealing a paver patio too soon after re-sanding is one of the most common ways homeowners undo a good repair. Polymeric sand needs its full cure window, often several days beyond the initial 24 to 72 hour traffic wait, before it’s stable enough to handle a sealer on top.
The bigger issue is chemistry, not just timing. Solvent-based sealers can soften or break down the polymer binder in the sand before it’s fully cured, leaving joints spongy or discolored. Some film-forming sealers also trap moisture against the joint instead of letting it breathe, which encourages the same hazing and softening problems the sand is supposed to resist in the first place.
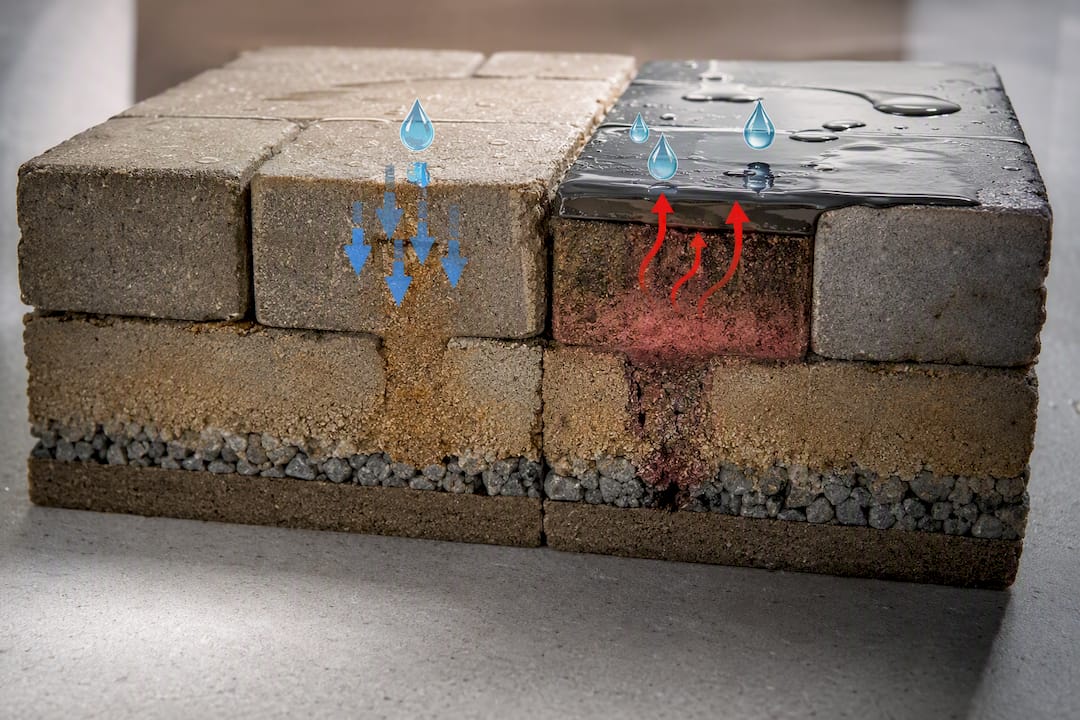
Not every sealer plays badly with polymeric sand, but matching the two matters. A penetrating, breathable sealer designed for use over polymeric-sand joints is a very different product from a heavy topical sealer meant for bare concrete, and using the wrong one can quietly ruin a re-sanding job weeks after the crew has packed up. If you’re planning to seal pavers that have polymeric sand joints, that’s a detail worth confirming before the product goes down, not after you spot a problem.
Do Pet Urine and Chemicals Damage Polymeric Sand?
Pet urine breaks down polymeric sand faster than plain weather exposure does. The combination of moisture and ammonia concentrated in one spot, especially where a dog reliably uses the same corner of the patio, softens the polymer binder and leaves that section of joint crumbly well before the rest of the patio shows any wear.
Deicing salts and other chemicals cause a similar accelerated breakdown. Rock salt and calcium chloride used on icy walkways in winter pull moisture into the joint and can chemically attack the polymer binder over repeated seasons, which is part of why joints near a front step or driveway edge often fail before joints in a shaded backyard patio.
Fertilizers, pool chemicals splashed from a nearby deck, and even some driveway degreasers do the same kind of localized damage. None of these are reasons to avoid polymeric sand. They’re reasons to rinse pet areas regularly, switch to a pet-safe or sand-friendly deicer where possible, and treat any chemical splash zone as a spot that will need re-sanding sooner than the rest of the patio.
Are Some Polymeric Sand Brands More Prone to Failure?
Not all polymeric sand behaves the same way, and the differences show up mostly in grain quality, polymer strength, and whether the formula includes additives like Portland cement. Finer, more consistent sand grains generally pack tighter and resist washout better than coarser blends, while stronger polymer content improves weed and erosion resistance.
Cement-enhanced formulas trade one problem for another. They create a harder, more watertight joint that holds up well against erosion, but that same rigidity makes them more prone to cracking in a severe freeze-thaw climate if the product is over-applied or the base isn’t stable. A softer, non-cement formula flexes a bit more, which can actually be the better call for a driveway that sees hard winters.
The practical takeaway isn’t that one brand is universally better. It’s that the product needs to match your joint width, your traffic load, and your climate. A sand rated for narrow pedestrian joints in a mild climate is going to underperform on a wide-joint flagstone patio in a region with hard freezes, regardless of how well it’s reviewed elsewhere.
Author’s Quick Take
Diagnose before you buy more sand: fix the drainage or base problem first, then re-sand correctly. DIY handles hazing and small patches; call a pro for base failure or repeat washout.
— Luis T
Get Professional Paver Re-Sanding in the Capital Region
If your patio or walkway keeps losing sand no matter what you try, a proper cleaning and re-sand from Capital Pro Pressure Washing fixes the root cause instead of patching the symptom. Our crews clean the joints, correct drainage or base issues where needed, and install polymeric sand and sealer built for the Capital Region’s freeze-thaw winters.

We handle everything from a small localized washout to a full patio re-sand, and we’ll tell you honestly if your issue needs a base repair rather than a sand refresh. Get a quote through our paver sand and sealing service, or check our pricing guide to see what a professional re-sand typically runs before you commit to another round of DIY patching.
Sources
For installation specifics, consult your product’s own label, which sets the exact activation and cure times for that formula. The sources cited throughout this article, including Hardscape Magazine and the Polymeric Sand Store’s installation guide, offer deeper trade-level detail. For base and substrate repair questions, Jsignor Exteriors’ guide on when to patch versus replace concrete is a useful reference.
- Demystifying polymeric sand | Hardscape Magazine
- The Homeowner’s Guide to Polymeric Sand (2026) | Today’s Homeowner
- How Do I Install & Apply Polymeric Sand? — Polymeric Sand Store
- Problems with Polymeric Sand - How to Hardscape
FAQ
What Are the Downsides of Polymeric Sand?
It requires a dry installation window, is prone to hazing if not cleaned off properly, can trap moisture and grow mold or moss in shaded joints, and holds up less reliably in harsh freeze-thaw climates.
What Is Better Than Polymeric Sand?
There’s no universally superior option. Traditional jointing sand is cheaper and easier to reinstall but offers no weed or washout resistance, while mechanical paver joint stabilization systems can outperform polymeric sand in high-traffic or wide-joint applications.
When Should You Not Use Polymeric Sand for Pavers?
Avoid it in joints wider than the product’s rated range, on surfaces that can’t guarantee a 24 to 48 hour dry window after installation, and directly over old, degraded polymeric sand without full removal first.
How Many Years Does Polymeric Sand Last?
Polymeric sand typically lasts 5 to 10 years, depending on the product quality, climate exposure, and how well the base and drainage were built.
Recommended
Need a quote in the Capital Region?
Fast, free estimates from a local, licensed & insured team.
