
Stop Artillery Fungus: Mulch Swap, Soft Wash for Capital Region
Fresh artillery fungus spots can often be softened and scrubbed away with basic tools; cured, tar-like spots frequently leave a permanent stain and may need professional soft-wash cleaning or repainting. The single best move the moment you spot the tiny orange or black dots is a warm soapy water soak and gentle brushing, not a scraper. Skip the dry-scraping and the pressure washer at full blast. Both spread viable spores back into your mulch, which just restarts the whole problem next season.
Quick Summary:
- Spotting fresh artillery fungus spots within a day or two offers the best chance for easy removal with warm soapy water and gentle brushing before they harden.
- Replacing contaminated mulch with inorganic options or blending in mushroom compost can significantly reduce future outbreaks, especially near white surfaces or vehicles.
- DIY efforts are realistic for small-area infestations or fresh spots, but large-scale or cured spots on delicate surfaces generally require professional soft-wash treatments and sealing.
- Using high-pressure washing or scraping cured spots risks surface damage and spreads spores, making low-pressure, dwell-time chemical treatments the safer, more effective method.
- Preventative landscape fixes, such as removing contaminated mulch and creating gaps between mulch and siding, are crucial to stopping recurring artillery fungus problems.
Table of Contents
- What Is Artillery Fungus, and Why Is It So Hard to Remove?
- Surface-By-Surface Removal: Siding, Cars, Windows, Wood, and Furniture
- Stop It at the Source: Mulch and Landscape Fixes That Prevent Recurrence
- When to Call a Professional (and What That Actually Involves)
- How Capital Pro Pressure Washing Handles Severe Cases
- The Part Most Guides Skip
- Get Cured Spots Off Safely Without Risking Your Siding or Paint
- Sources
- FAQ
What Is Artillery Fungus, and Why Is It So Hard to Remove?
Artillery fungus (genus Sphaerobolus) is a small mulch-dwelling fungus that does something almost no other lawn nuisance does: it aims. The fruiting body builds pressure and launches a spore mass called a peridiole toward the brightest light source nearby, which is usually your white siding, your parked car, or a sunlit window. That peridiole is coated in an adhesive that behaves like superglue on contact, and once it cures, it can be nearly impossible to remove without damaging the surface underneath.
This is the standard industry term you will see on extension websites and in pest-control literature, and it is worth knowing because “shotgun fungus” (the folk name, from the pattern the spores leave, like a shotgun blast of black specks) refers to the exact same organism. If you searched for shotgun fungus on siding or artillery fungus on vinyl siding, you are dealing with the same fungus and the same removal problem.
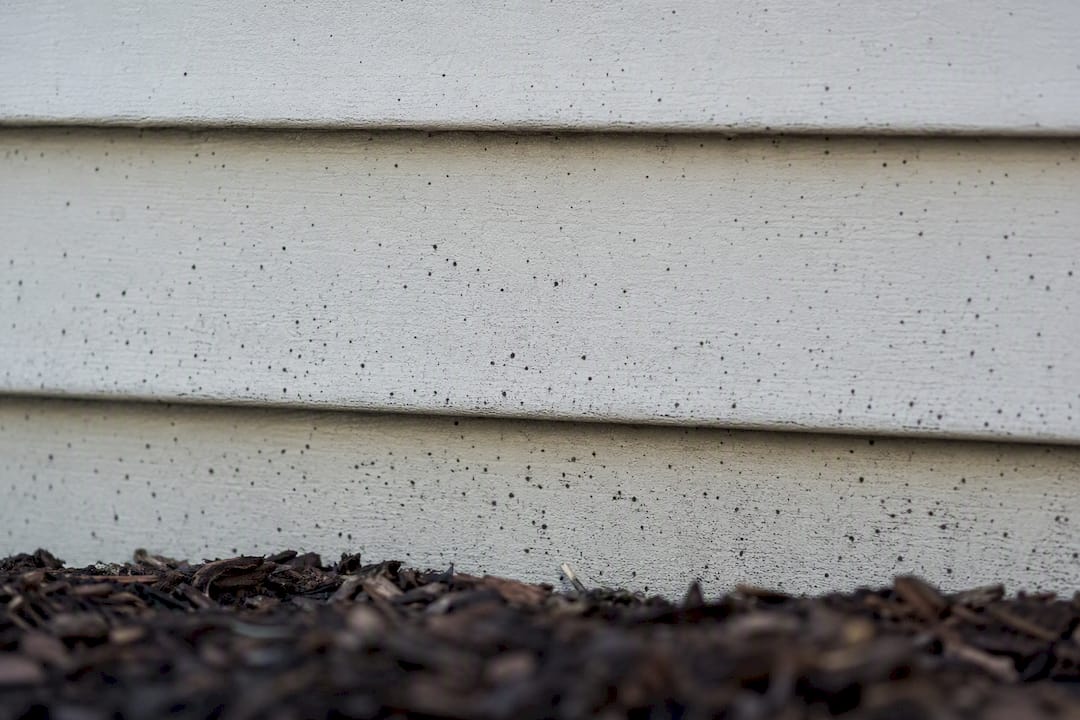
The dots start as tiny, tar-colored specks, often mistaken for dirt or insect droppings, roughly 1 to 2 millimeters across. They cluster in irregular patterns, usually on the shaded, north-facing side of a house where mulch stays damp longest. Catch them within a day or two and the glue hasn’t fully set. Give it a week of sun exposure and you’re often looking at a stain instead of a stuck-on object.
Timing drives everything. According to Penn State Extension, fruiting happens most heavily in spring and fall when mulch stays consistently moist and temperatures sit in the 50 to 70 degree range, though a wet summer can trigger a second wave. That window is also your best chance for easy removal, before UV exposure and repeated heat cycles bake the peridiole into the paint or vinyl.
Surface-By-Surface Removal: Siding, Cars, Windows, Wood, and Furniture
Artillery fungus treatment isn’t one method. What lifts a spot off glass will ruin a car’s clear coat, and what works on wood will do nothing for vinyl. Test any product on a hidden patch first. Every surface below deserves that five-minute precaution before you commit to a technique.
Vinyl and painted siding. Start with warm water, a few drops of dish detergent, and a soft-bristle brush or a melamine sponge. Let it sit for a couple of minutes, then work in small circles rather than scrubbing hard in one direction, which can grind the residue deeper into the vinyl’s texture. For spots that resist that first pass, an oxygen bleach solution (the powdered kind you mix with water, not chlorine bleach) left to dwell for 10 to 15 minutes before a second scrub often finishes the job on fresh contamination. Cured spots on siding are the hardest category here. Fresh spots respond best to soapy water and a soft brush, but once the glue-like residue fully hardens, UDel Extension notes there’s no guaranteed way to lift it clean, and the spore itself stays biologically viable for up to a decade if it ends up back in soil. A soft-wash approach that pairs a dwell-time cleaner with low-pressure rinsing tends to outperform straight scrubbing on larger infestations because it lifts contamination without driving it into the panel seams.
Cars and automotive paint. This is where people do the most accidental damage. Never take a razor blade or a fingernail to a spot on clear coat; you will create a micro-scratch that catches dirt and looks worse than the fungus did. Instead, try a clay bar with detailing lubricant, gliding it over the spot rather than pressing down. If the clay bar doesn’t fully lift it, an automotive tar-and-adhesive remover, the same product you’d use on road tar, is generally safe on cured clear coat when used per label instructions. This combination approach is what most professional detailers reach for on cured spots, since it’s less abrasive than the scraping or polishing compounds people default to.
Windows and glass. Glass is the forgiving surface here. A plastic razor scraper (the kind sold for stovetop glass) held at a low angle can shave off dried peridioles without scratching, followed by a standard glass cleaner. Metal blades work too but raise the risk of a scratch if you’re not careful with the angle.
Porous wood: decks, fences, siding trim. Wood is the surface most likely to end in a permanent stain, because the spore’s dye penetrates the grain rather than sitting on top of it. Oxygen bleach with a longer dwell time, 20 to 30 minutes, plus a stiff (not wire) brush is the best first attempt. If the stain remains after that, you’re usually looking at sanding and refinishing that section rather than continued cleaning attempts.
Outdoor furniture and cushions. Fabric and resin furniture respond well to the same soapy water and soft brush combination used on siding, since neither surface has a clear coat to protect. Move furniture away from mulch beds during peak fruiting season if you keep having repeat problems in the same spot.
A few materials show up across almost every one of these jobs:
- Soft-bristle brush or melamine sponge for the first pass on any surface
- Oxygen bleach powder (not chlorine) for dwell-time treatment on siding and wood
- Automotive clay bar and tar remover, reserved specifically for car paint
- Plastic scraper for glass only, never for painted or clear-coated surfaces
- Isopropyl alcohol on a soft cloth for lifting sticky residue that soap alone won’t touch
Pro Tip: Photograph the spot before you start cleaning. If the color lifts with the residue, you’re dealing with surface contamination. If a faded or discolored outline remains after the residue is gone, that’s a stain, and no amount of additional scrubbing is going to fix it. Stop before you damage the finish trying.
Realistically, a single wall or one car is a weekend DIY project if the spots are fresh. A two-story house with heavy infestation, or a car that sat in a driveway all summer next to contaminated mulch, is a different math problem. Dozens of cured spots multiplied across a large surface area is the point where DIY effort stops being worth it, and where cured spots on delicate finishes start pushing toward professional help rather than another can of tar remover.
Stop It at the Source: Mulch and Landscape Fixes That Prevent Recurrence
Preventing artillery fungus matters more than any removal technique, because the fungus lives in your mulch, not on your siding. Wood-based mulch, especially the kind that’s already partially decomposed, gives Sphaerobolus exactly the moisture and shade it needs to fruit. The fungus then does its part by launching spores toward whatever light-colored surface sits nearby, which explains why the stains cluster near white trim, dark cars parked close to beds, and window screens more than anywhere else. UMass Amherst’s extension program documents this light-seeking behavior in detail, and it’s the reason mulch placement matters as much as mulch type.
Here’s the practical sequence for fixing a bed that keeps producing new spots:
- Remove the contaminated mulch entirely. Bag it for trash pickup. Do not add it to a compost pile, since that just relocates active spores to wherever you eventually spread the finished compost.
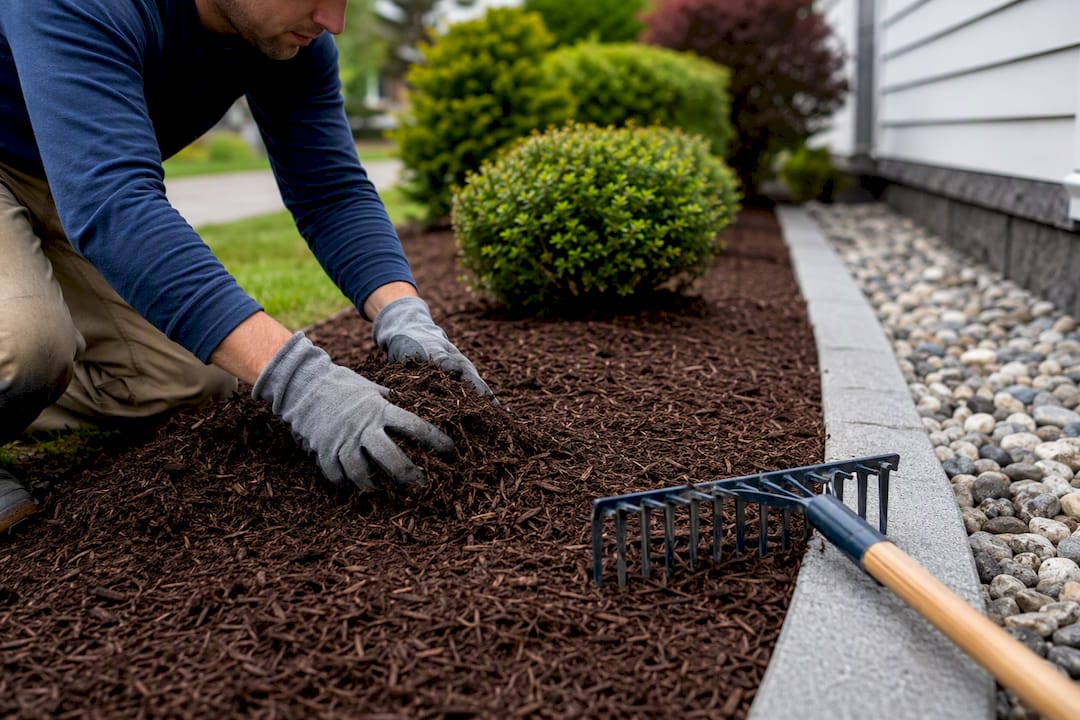
- Replace it with a lower-risk material. Pine bark nuggets break down more slowly than shredded hardwood mulch and give the fungus far less to work with. Inorganic options like rubber mulch or river rock eliminate the food source completely in beds against siding or near parked cars.
- Keep mulch depth to 2 to 3 inches. Piling it deeper traps moisture at the base, which is exactly the condition that favors fruiting.
- Leave a gap between mulch and siding. A foot of bare ground or gravel between the bed edge and the house wall cuts down how many spores land somewhere that matters.
- Rake and turn the mulch periodically. Disturbing the surface interrupts fruiting cycles and speeds up drying between rain events.
If switching to pine bark or gravel isn’t an option, because you want the look or the moisture retention of hardwood mulch, there’s a research-backed middle path. Blending at least 40% fresh mushroom compost into existing mulch has been shown to suppress artillery fungus over a season or two, according to findings from Penn State Extension. The competing microbes in the compost appear to crowd out Sphaerobolus without requiring you to abandon organic mulch altogether. It’s not instant and it’s not a guaranteed fix for every bed, but it’s the closest thing to a middle-ground answer that extension research actually supports.
What won’t work: chemical fungicides. There is no reliable fungicidal spray for artillery fungus in mulch, and extension sources are consistent on that point. Skip the garden-center fungicide aisle and put that budget toward mulch replacement instead.
Beyond mulch swaps, ongoing maintenance keeps outbreaks from creeping back. Improve drainage around foundation beds so water doesn’t pool after storms. Prune back shrubs and low tree limbs that shade the north side of the house, since that shade is exactly what keeps mulch damp long enough to trigger fruiting. A landscaper who handles routine mulch installation and bed cleanup can build these habits into a seasonal schedule if you’d rather not manage it yourself.
When to Call a Professional (and What That Actually Involves)
DIY removal has real limits, and knowing where they sit saves you from making a cured stain permanent through repeated scrubbing attempts. A few situations call for professional help rather than another trip to the hardware store:
- Large surface area, think a full two-story elevation, where dozens of spots have accumulated over more than one season
- Repeated outbreaks on the same wall or driveway that keep coming back despite mulch changes
- Cured spots on delicate finishes like automotive clear coat or fresh paint, where an amateur attempt risks permanent damage
- Any job requiring ladder work above what you’re comfortable doing safely
A competent professional approaches this differently than a homeowner with a garden hose. Containment comes first, tarping or diverting runoff so loosened spores don’t just wash into a clean bed nearby. From there, a soft-wash detergent with proper dwell time does the chemical work, followed by a low-pressure rinse rather than a high-PSI blast. That distinction matters because IWCA’s technical guidance on artillery fungus notes that high pressure often fails on cured spots anyway and risks etching vinyl or stripping paint in the process. Targeted stain solvents handle stubborn residue, and sealing afterward can reduce how much future contamination sticks.
Before hiring anyone, ask a few direct questions: do they have documented soft-wash experience specifically (not just general pressure washing), are they insured, can they provide references, and do they offer any warranty on stain removal versus just a general cleaning guarantee. Cost depends on scope, roof or wall height, access difficulty, and surface type, and severe cured staining sometimes means the honest answer is repainting rather than continued cleaning attempts.
How Capital Pro Pressure Washing Handles Severe Cases
For infestations beyond weekend DIY territory, our workflow at Capital Pro Pressure Washing follows a set sequence built around protecting the surface underneath, not just lifting the visible stain.
- Inspect the affected area and document the extent of contamination before touching anything
- Contain the work zone so loosened spores don’t wash into nearby beds or driveways
- Apply a surface-safe dwell cleaner formulated for organic staining
- Finish with a low-pressure soft-wash rinse instead of high PSI
- Offer optional sealing afterward to make future spots easier to remove
We lean on soft-wash technique specifically because vinyl siding and automotive-grade finishes don’t hold up to the pressure levels that would be needed to force cured spots off mechanically. As a veteran-owned company with over 10 years serving the Capital Region, we pair that cleaning step with sealing services so homeowners aren’t back in the same spot next spring.
Pro Tip: If you’ve had artillery fungus on the same wall two years running, that’s your signal to call rather than DIY again. Recurring spots on the same elevation almost always trace back to a mulch bed that needs a full swap, not a cleaner scrub.
Two-story jobs, large-area siding, and recurrent infestations near delicate finishes are exactly the cases where a professional visit pays for itself over another weekend of scraping.
The Part Most Guides Skip
Most advice on this topic treats artillery fungus removal like a cleaning problem. It’s a landscaping problem that happens to show up on your siding. Scrub the spots without touching the mulch bed fifteen feet away, and you’re not solving anything, you’re just resetting the clock until the next fruiting cycle.
The bigger miss in conventional advice is the scraping instinct. It feels productive, and it’s the worst thing you can do to a bed that’s already producing spores, because it launches contamination right back into the soil that started the problem. Soapy water and patience beat a razor blade every time on fresh spots, and no amount of elbow grease beats mulch you should have replaced last season on cured ones.
If you take one thing from this, prioritize the mulch swap before you worry about technique. A homeowner who spends an afternoon replacing hardwood mulch with pine bark nuggets near the foundation will do more for their siding over the next three years than someone who perfects their scrubbing method but leaves the source material untouched.
— Luis T
Get Cured Spots Off Safely Without Risking Your Siding or Paint
Capital Pro Pressure Washing gives Capital Region homeowners something a bottle of tar remover can’t: a soft-wash method built specifically to lift cured, glue-like stains without the etching or stripping risk that comes with cranking up PSI on vinyl or clear coat. For a single stubborn spot on your car, DIY with a clay bar is fine. For siding covered in spots across two stories, or a driveway bed that keeps reinfecting itself season after season, that’s a different scale of problem, and it’s exactly the kind of job our soft-wash service is built around.

We combine the cleaning pass with sealing where it makes sense, so the surface underneath is less hospitable to future contamination, not just clean for the moment. If you’re staring at a siding wall that looks worse every spring, request a quote through our house washing page and we’ll walk you through what the job actually involves before any work starts, including a realistic look at cost based on your home’s size and access.
Sources
- Artillery Fungus and Other Things that Grow in Mulch (UDel extension fact sheet)
- Artillery fungus in mulch (Penn State Extension)
- Fungi in mulches and composts (UMass Amherst)
- IWCA technical bulletin: dealing with artillery fungus
FAQ
What is the best way to remove artillery fungus from my car?
Try a clay bar with detailing lubricant first, since it lifts cured spots without scratching clear coat. If residue remains, an automotive tar-and-adhesive remover applied per label instructions usually finishes the job.
How can I remove artillery fungus from my house siding?
Soak fresh spots in warm soapy water and scrub gently with a soft-bristle brush; for stubborn residue, let an oxygen bleach solution dwell for 10 to 15 minutes before a second scrub. Cured spots may leave a permanent stain no amount of scrubbing will fully lift.
How can I remove artillery fungus from my mulch?
You don’t remove it from mulch spot by spot; you replace the contaminated mulch entirely and bag it for trash, never compost. Switching to pine bark nuggets or blending in at least 40% fresh mushroom compost helps prevent it from returning.
How can I remove artillery fungus from my car paint?
Never scrape cured spots off paint with a blade, since that scratches clear coat permanently. A clay bar and lubricant, followed by a dedicated tar remover if needed, is the safer sequence for lifting cured residue.
When should I hire a professional instead of doing it myself?
Large surface areas, repeat outbreaks on the same wall, and cured spots on delicate finishes like clear coat or fresh paint are the main triggers for calling a pro rather than continuing DIY attempts.
Will pressure washing remove artillery fungus?
High-pressure washing often fails to remove cured spots and can damage vinyl siding or automotive clear coat in the process; a soft-wash approach with lower pressure and a dwell-time cleaner is generally safer and more effective.
Recommended
Services Related To This Article
Need a quote in the Capital Region?
Fast, free estimates from a local, licensed & insured team.
